Thursday, February 20, 2014

Counter top Phase two and three!

   So here is the second and third part of my painted counter tops. I looked up a ton of other peoples work to figure out how to do this and mine looks nothing like ANYTHING I saw online. But I got a lot of good tips. I added shadowing and veining because it just didn't look like any kind of stone to me. The granite look didn't really work out so I decided just to do what I like. I also added glitter into the veining which I'm going to try to photograph tomorrow with my good camera. My cell pics make it look more like real stone than I think they do in person, however they are still pretty and I can live with them for a while. The boy loves them. My Marine doesn't seem to care either way he just wants the kitchen back.


I really liked the iridescent in the granite sample I got so I hunted for a paint. You have to go to the artist end with the good acrylics not the craft section. I ended up buying a tube of iridescent blue acrylic paint (Golden Brand) it's an expensive brand but I had a coupon. Also excellent paints. If they had the color in any other brand I would have gotten it but sadly they do not carry any kind of iridescent paint in the cheaper varieties.
I think it helped add some depth and I really love it... it kind of makes me want to paint my walls blue.... but I don't think my Marine will let me.. maybe I'll hold off on that for now.


I dragged the veining down over the edge and up onto the back splash and shadowed in any areas that stood out to me. This is a really random process, just go nuts. This step really comes down to playing with the paint. At worst you hate it and just re-sponge some color over it. I had to do this to some kitty paw prints in my paint which I was not too happy about.


So tonight I put on the Glaze. I went with the Rust-Oleum Parks pour on glaze. I think I needed another box though. I bought two and it really was not enough, I stretched it a little too much I think and it's not as level as I had hoped. I'm going to buy more next week and add another layer but this coat will suffice for now and it's far more protected than it was. I simply don't like looking at an uneven finish so I won't be able to live with it for long.

I have to say though it really was not as strong smelling as I had feared, it reminded me of hair color but it was not too strong, so a huge plus for indoor projects. I had the window open but I think I could have done without it honestly.

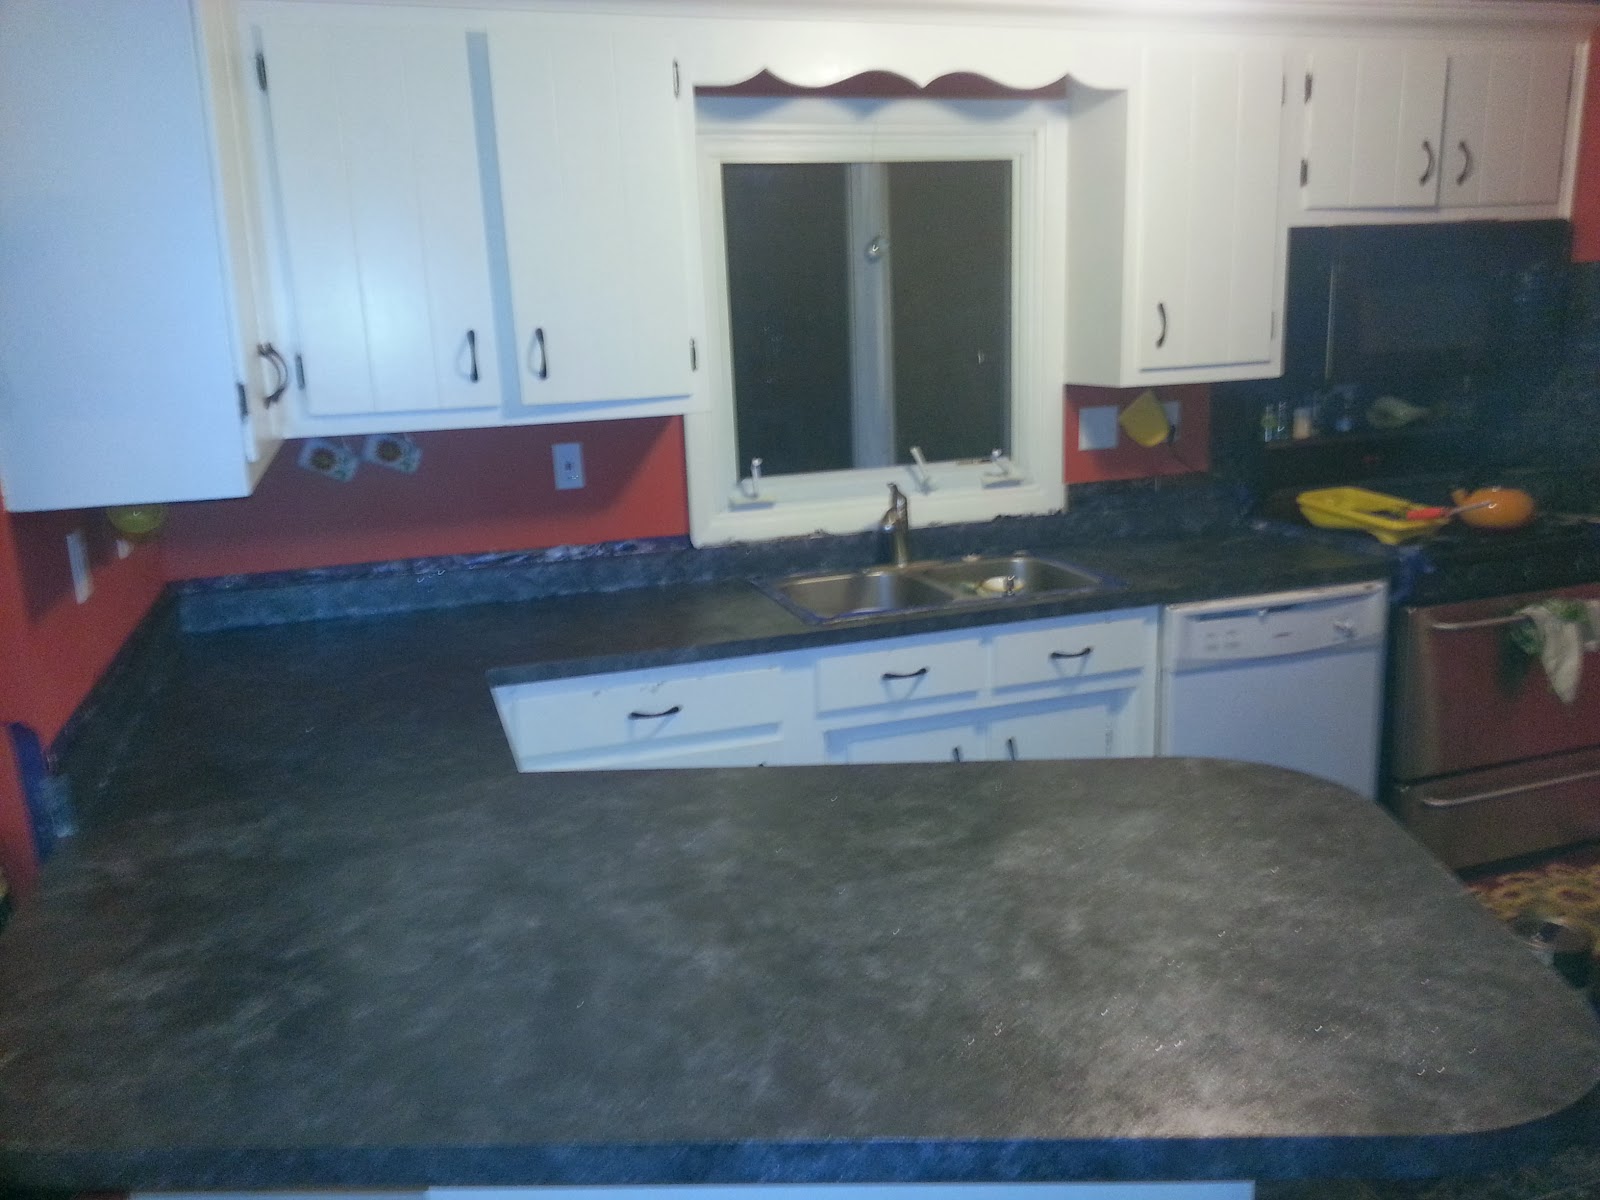
It is VERY messy and sticky this is not a project for the faint of heart. You want to have lots of containers you can throw out, and a brush you can toss because this stuff is a pain to clean. I just don't think you can screw it up beyond repair. You can sand it down and re-do it. I plan on using it again so I know I'll get better every time I use it. Honestly I could probably leave it as is if I weren't so anal about stuff. So here it is glaze all poured!


It's so shiny and wet right now! It takes about 8 hours to dry touch 72 before real use comes in. I'd like to let it cure as long as I can.
Over all this project has taken me 4 days thus far between dry time hand painting and glazing. Of course I touched it up a million times, but still. A few hours a night is all I spent.
I'd say plan for about a week if you plan to tackle this yourself, maybe a week and a half since it takes about 3 days to fully cure, and since I plan to do another coat of glaze it'll add 3-4 more days to my time.
 The glazing took maybe an hour and a half but a lot of that was prepping and mixing. You only have about 20 minutes to work with the glaze before you can NOT mess with it. It almost seemed like less to me. A lot of people suggest a hair dryer for any bubbles but honestly it just got in my way and didn't help much. I just blew on them and it worked. I used a brush to apply it to the edging and back splash.

 I'm pretty excited to use them and My Marine can not wait to have his kitchen back, he has been very tolerant of my insanity and dealing with the whole house being up rooted. But the kitchen will be a little more done... now to con dad into finishing my trim.... ;)

Monday, February 17, 2014

Painted Counter Tops

It's been a while! I have been working on stuff but it's be fixing jewelry and I didn't take any pictures so I don't have much of post for that now do I?
I did however start a new project tonight, Painting my countertops!
They were light pink and loved to stain. here is a picture but I used my phone so they are not the best but I did take them so that is a start!

Pale pink.. and old, they have been though a lot. We plan on re-doing the kitchen but it's not the time so this is my temporary solution until we can re-do everything.
 First I removed the old caulk it was yellow and half gone. I re caulked with the waterproof and paintable stuff. I let that dry. Then I primed it with 123 see below:

 It's hard to tell but it's white now. I let that dry for an hour then I did the base coat black with a gallon I had stored up, it was an opps paint I got for 5 bucks.


 I let that sit for a little while but I wanted to blend it so I didn't let it fully dry, it worked for me this way but a lot of people recommend letting it dry overnight. I have no patience for that kind of thing.
So I grabbed my sea sponge and my paints and just went to town. I used a black glitter paint as my first layer again it doesn't show up very well but you can see where I started on the edge.


 I layered a lot I used a gray glitter paint and a metallic silver and finally a metallic color called black coffee. And I just layered and layered and layered.


 I started to tone down the white and got this look:


It's starting to look like stone, I have some more work to do tomorrow on it, I want to add some more depth and some veining but I couldn't do anymore tonight. I also threw some glitter in there but it totally doesn't show up. And I have to seal it with poly. Since it is such a big project I figured I'd split it up, plus I couldn't wait to post it anyways.